Wildlife photography often looks like a hobby for people with huge lenses and costly safaris. In reality, you can start learning it with basic equipment, local places, and a simple plan. What matters most is how you see, where you stand, and how patient you are, not how big your camera bag is.
If you have a camera with some zoom, or even a bridge camera or entry-level DSLR, you already have enough to begin. Instead of waiting to buy “proper” gear, you can start building skills right now.

A simple forest track in Corbett shows that any regular safari route is enough to start wildlife photography
Think like a field naturalist, not like a gear collector
The easiest way to save money in wildlife photography is to change your mindset. Expensive equipment helps only when you already understand your subjects, but basic gear becomes powerful when you learn animal behavior, timings, and good locations.
Spend time observing how birds behave near water, when deer come to open grass, and how light moves through the forest. Even a simple safari drive or nature walk becomes a classroom when you watch carefully instead of only hunting for rare species.
Start close to home and choose easy subjects
You do not need a dream trip to begin. Many beginners make strong images around city wetlands, nearby forests, or even village edges. Common birds, deer, monkeys, peafowl, and waders are perfect practice partners because you can see them often and try again if you miss the shot.

A colorful swamphen at a local wetland proves everyday birds make perfect practice subjects
The deep blue swamphen near a wetland edge, a peafowl on a stone in jungle scrub, or a group of deer grazing by water can all teach you framing, timing, and patience. Once you become comfortable with these simpler situations, you will be ready to handle faster or more elusive animals.

A herd of deer by the water is a classic scene to practice composition and timing
One camera and one zoom lens is enough to learn
For most beginners, a single camera body with a mid‑range or telephoto zoom is enough. You do not need multiple bodies or a giant prime lens at the start. A lens in the 200–400 mm range on a crop-sensor body is already powerful in many situations.
Instead of worrying about the exact model, focus on knowing your tool well. Learn how to quickly change shutter speed and ISO, how to use burst mode, and how to lock focus on an animal’s eye. These habits are free, but they make a bigger difference than a price tag.
Use light and position as your “secret weapons”
When gear is modest, light and position become your best friends. Early morning and late evening give softer, warmer light that makes fur, feathers, and forest color look better without any extra cost. Even budget cameras can produce pleasing results if the light is kind.
Try to place yourself where the animal is side‑lit or gently backlit. Move a little to get a cleaner background, or wait for a bird to step onto a log or open ground. A simple change in angle can turn an ordinary frame into something you are proud to share.

Soft forest light on an elephant turns ordinary moments into strong wildlife portraits
Let the animals come to you
You do not always need huge reach if you choose the right spots. Many good wildlife images are taken where animals naturally pass—near water, open clearings, tree trunks, and favourite perches. Sitting quietly near these places gives you closer opportunities even with shorter lenses.
On safaris, resist the urge to constantly chase rumors of a big cat. Sometimes parking near a waterbody, grass patch, or trail and staying patient brings much better results: deer walking into the frame, birds landing on branches, or elephants emerging from the trees.
Focus on stable shots, not extreme magnification
A slightly wider, sharp image is better than a shaky, tightly cropped one. When your lens is at full zoom, small vibrations become big problems. Use steady hand‑holding, lean against the jeep if possible, or brace your elbows on your knees. Keep shutter speed high enough for moving subjects, even if it means using a higher ISO.
Do not feel bad if the animal is not filling the entire frame. Environmental portraits, where the subject is smaller but the habitat is clear, are often more interesting and easier to shoot with affordable gear.

An Asiatic lion in open grassland captures the wild drama beginners can achieve with practice
Upgrade slowly and only when you truly feel limited
At some point, you may feel your current gear is holding you back—perhaps your lens focuses too slowly, or you often need more reach. That is the right time to think about changes, not at the very beginning.
Before buying new equipment, consider renting lenses for special trips, borrowing from friends, or buying used gear from trusted sources. This keeps costs low and helps you understand what you actually need instead of what looks impressive.
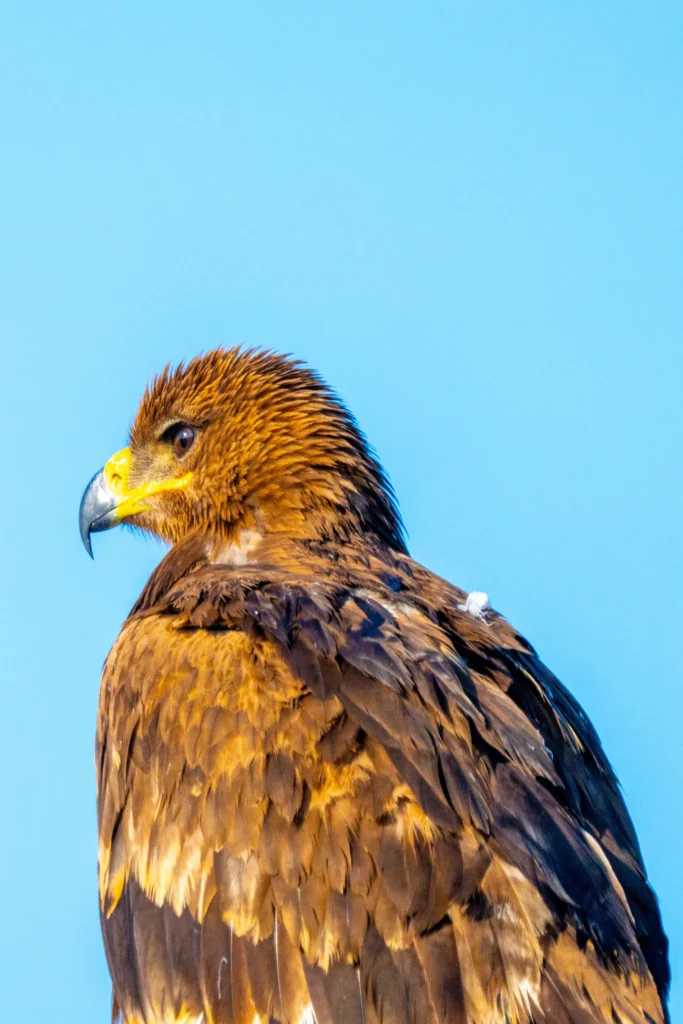
A sharp steppe eagle portrait shows what patience and clean light can achieve with simple gear
A simple practice plan to get better
You can build a strong foundation with a simple routine:
- Visit a nearby park, lake, or forest once a week.
- Pick one species or one small area and photograph it for the whole session.
- At home, keep only the few images that are sharply focused and well composed.
- Notice what worked, then try to repeat and improve it in your next outing.
Over time, you will see that your images start looking more consistent, and you will know that your skills—not your budget—are driving the progress.

Safari jeeps at Kabini’s backwaters show regular outings matter more than fancy equipment
Frequently Asked Questions (FAQs)
Notice Title
All images used in this blog are copyrighted. Unauthorized use, reproduction, or redistribution of these images is strictly prohibited. Please contact the site owner for permission or licensing inquiries.